
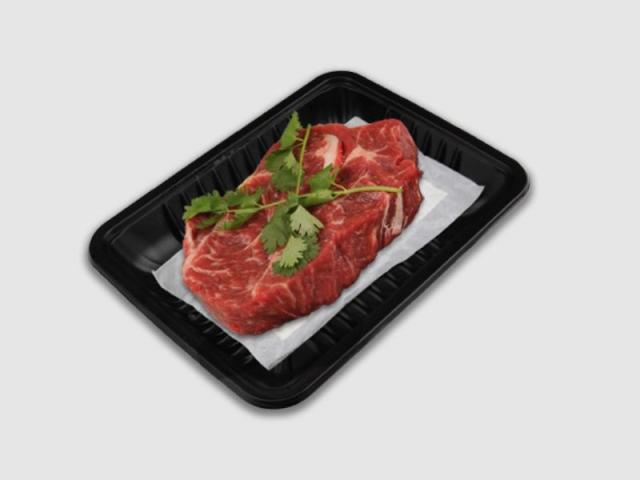
Most pad-sizing problems are really about measuring the wrong part of the tray. A soaker pad should be sized to the inner base where it actually sits, not to the tray’s outer footprint, and it needs clearances a catalogue photo never shows. The repeatable sequence is short: measure, subtract your clearances, choose a capacity band, then prove the size on a real tray with a purge test. This guide gives that method in an order you can reuse for every tray you pack.
1. The three-step sizing method
Work in this order and the common mistakes mostly disappear:
- Measure where the pad actually rests. A tray is wider at the top than at its base, and the pad sits on the base — so measure the inner base length and width at the level where the pad will lie. On trays with drainage wells or ribs, note the area between the ribs: that is where liquid gathers and where the pad must keep contact.
- Decide the clearances. The pad should not climb the side wall, fold against the rim, reach the zone where a lid or film will seal, or cover a viewing window you want open. Subtract your clearances from both dimensions; what remains is the largest usable pad footprint.
- Match the format to the line. For manual packing, a die-cut sheet that fits that usable area and lies flat under the meat is the simple answer; on automatic lines the same area is achieved by roll width and the inserter’s placement.
2. Fitting capacity into the same footprint
A tray rarely changes size because you want more absorbency — instead you choose a different pad inside the same footprint, distinguished by gram weight and construction (tissue, tissue with SAP, or a denser SAP core). Two things follow. Higher capacity in the same footprint usually means a thicker pad, so confirm the extra height does not push the meat into the seal. And more capacity is pointless if your purge test does not need it — heavier is only different, not automatically better. For the capacity band your cut and pack weight are likely to need, start from the purge logic in our meat soaker pad guide; this page covers measuring the pad against the tray.
3. Thinking in bands, not fixed sizes
Fixed tray sizes differ by market and tray maker, so a printed table of centimetres would mislead you. What transfers is the method — treat the bands below as a thinking frame, then measure your own tray:
| Tray scale | What you are really measuring | Pad-size thinking | Capacity band to lean toward |
|---|---|---|---|
| Single-portion tray | small inner base, low ribs | keep the pad inside the base with a modest clearance | light to moderate — oversized pads read wrong on small trays |
| Family or multi-portion tray | wider base, seal edge further out | use the usable area but stay clear of the seal | moderate, then confirm by purge test |
| Deep or bulk tray | greater depth, tall side walls | pad height must not lift the product | moderate to heavier, chosen from purge, not footprint |
None of these bands promises a specific absorbency — the purge test on your product decides the exact figure.
4. Proving the size: a purge test you can repeat
- Use the liquid the pack produces — collected purge if you can, otherwise warm water as a stand-in. Water and purge do not behave identically, so treat the water result as directional.
- Put the pad in the real tray, add the meat or a stand-in of the same footprint, and cover it with the film or lid you ship with.
- Apply the stacking and dwell your chain uses, then inspect. Liquid outside the pad’s edges, on the underside of the film, or on the tray base each points to a different fix — another size, capacity band, or placement.
- Repeat with the next batch of trays, because tray tooling and production batches vary.
5. Common mistakes to avoid
- Measuring the outer footprint instead of the inner base, then ordering a pad that overhangs.
- Letting the pad ride up the side wall, where it is crushed under the rim and stops draining the base.
- Sizing from memory and never re-verifying when the tray supplier changes.
- Assuming the pad must cover the whole base. It must cover the drainage area — covering everything is not the same thing.
6. FAQ
I do not have callipers. How do I measure?
A ruler is enough. Measure inside the base at two points in each direction — walls are rarely square — take the smaller reading, and verify the pad lies flat.
Does the pad have to cover the entire base?
Not necessarily. It should cover where liquid gathers and stay clear of the seal and viewing areas. A pad that barely fits edge-to-edge and folds is worse than a slightly smaller pad that lies flat.
How much liquid should I use in the purge test?
Start from what your product actually releases in the dwell you care about — weigh the product before and after a representative chill to get the figure — then test at that level and a little above to see the reserve.
My trays differ between batches. What should I do?
Measure a sample from each batch and tell the pad supplier the tolerance you can accept. Keep a small clearance in your size so normal variation does not push the pad into the seal.
7. Take it further
For the meat line itself, see meat absorbent pads, with beef and pork examples at beef absorbent pads and pork absorbent pads. If the tray decision is new to you, the capacity basics behind this method live in the meat soaker pad guide.